Dein Warenkorb ist gerade leer!


Handgefertigte Pendelleuchte – Installations- & Produktanleitung
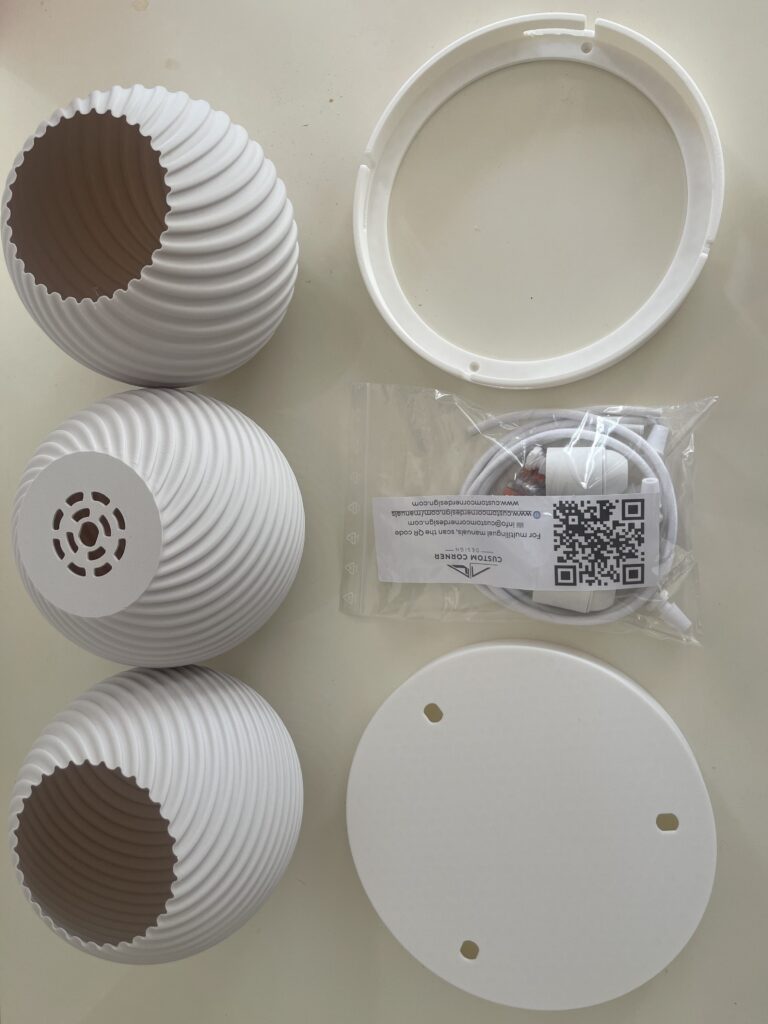
Lieferumfang
Von uns hergestellte Teile:
- 3D-gedruckter Lampenschirm
- 3D-gedruckte Deckenrosette
- 3D-gedruckte Deckenhalterung
Teile von EU-Lieferanten:
- E27-Fassung
- Textilkabel
- Kabelklemmen
- Wago-Klemmen
- Montageschrauben
- Dübel für Beton
Werkzeuge, die du benötigst
- Bohrmaschine
- Schraubendreher
- Spannungsprüfer (empfohlen)
Vor der Installation
Deckenrosette vorbereiten
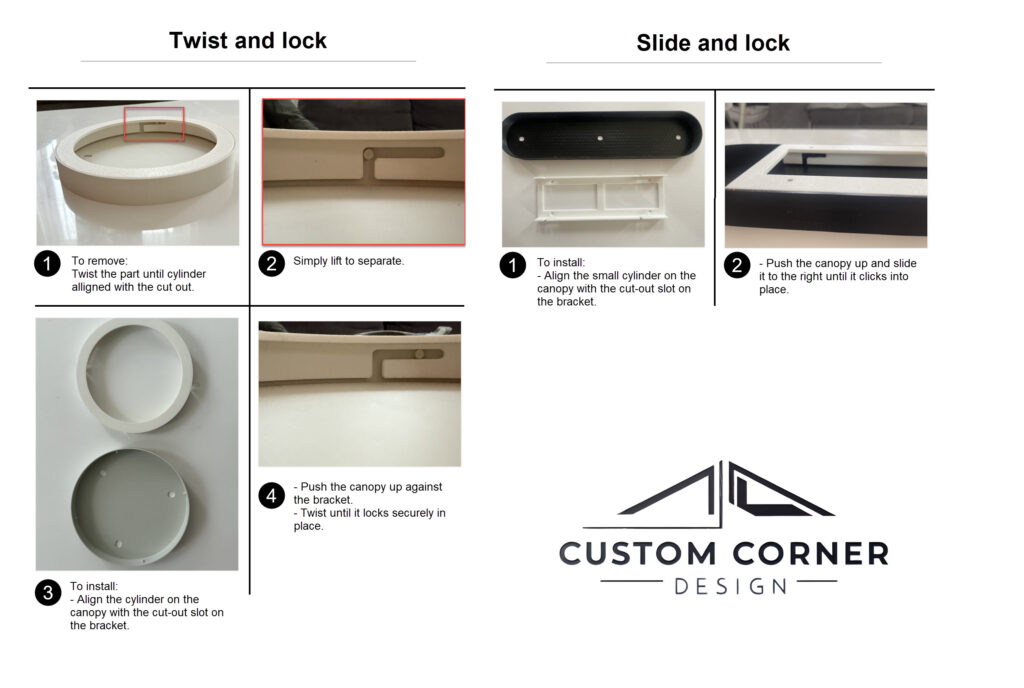
Die Kunststoffabdeckung und die Deckenrosette sind mit einem Drehverschluss gesichert. Um die Installation zu beginnen, drehe sie nach rechts, um sie zu lösen.
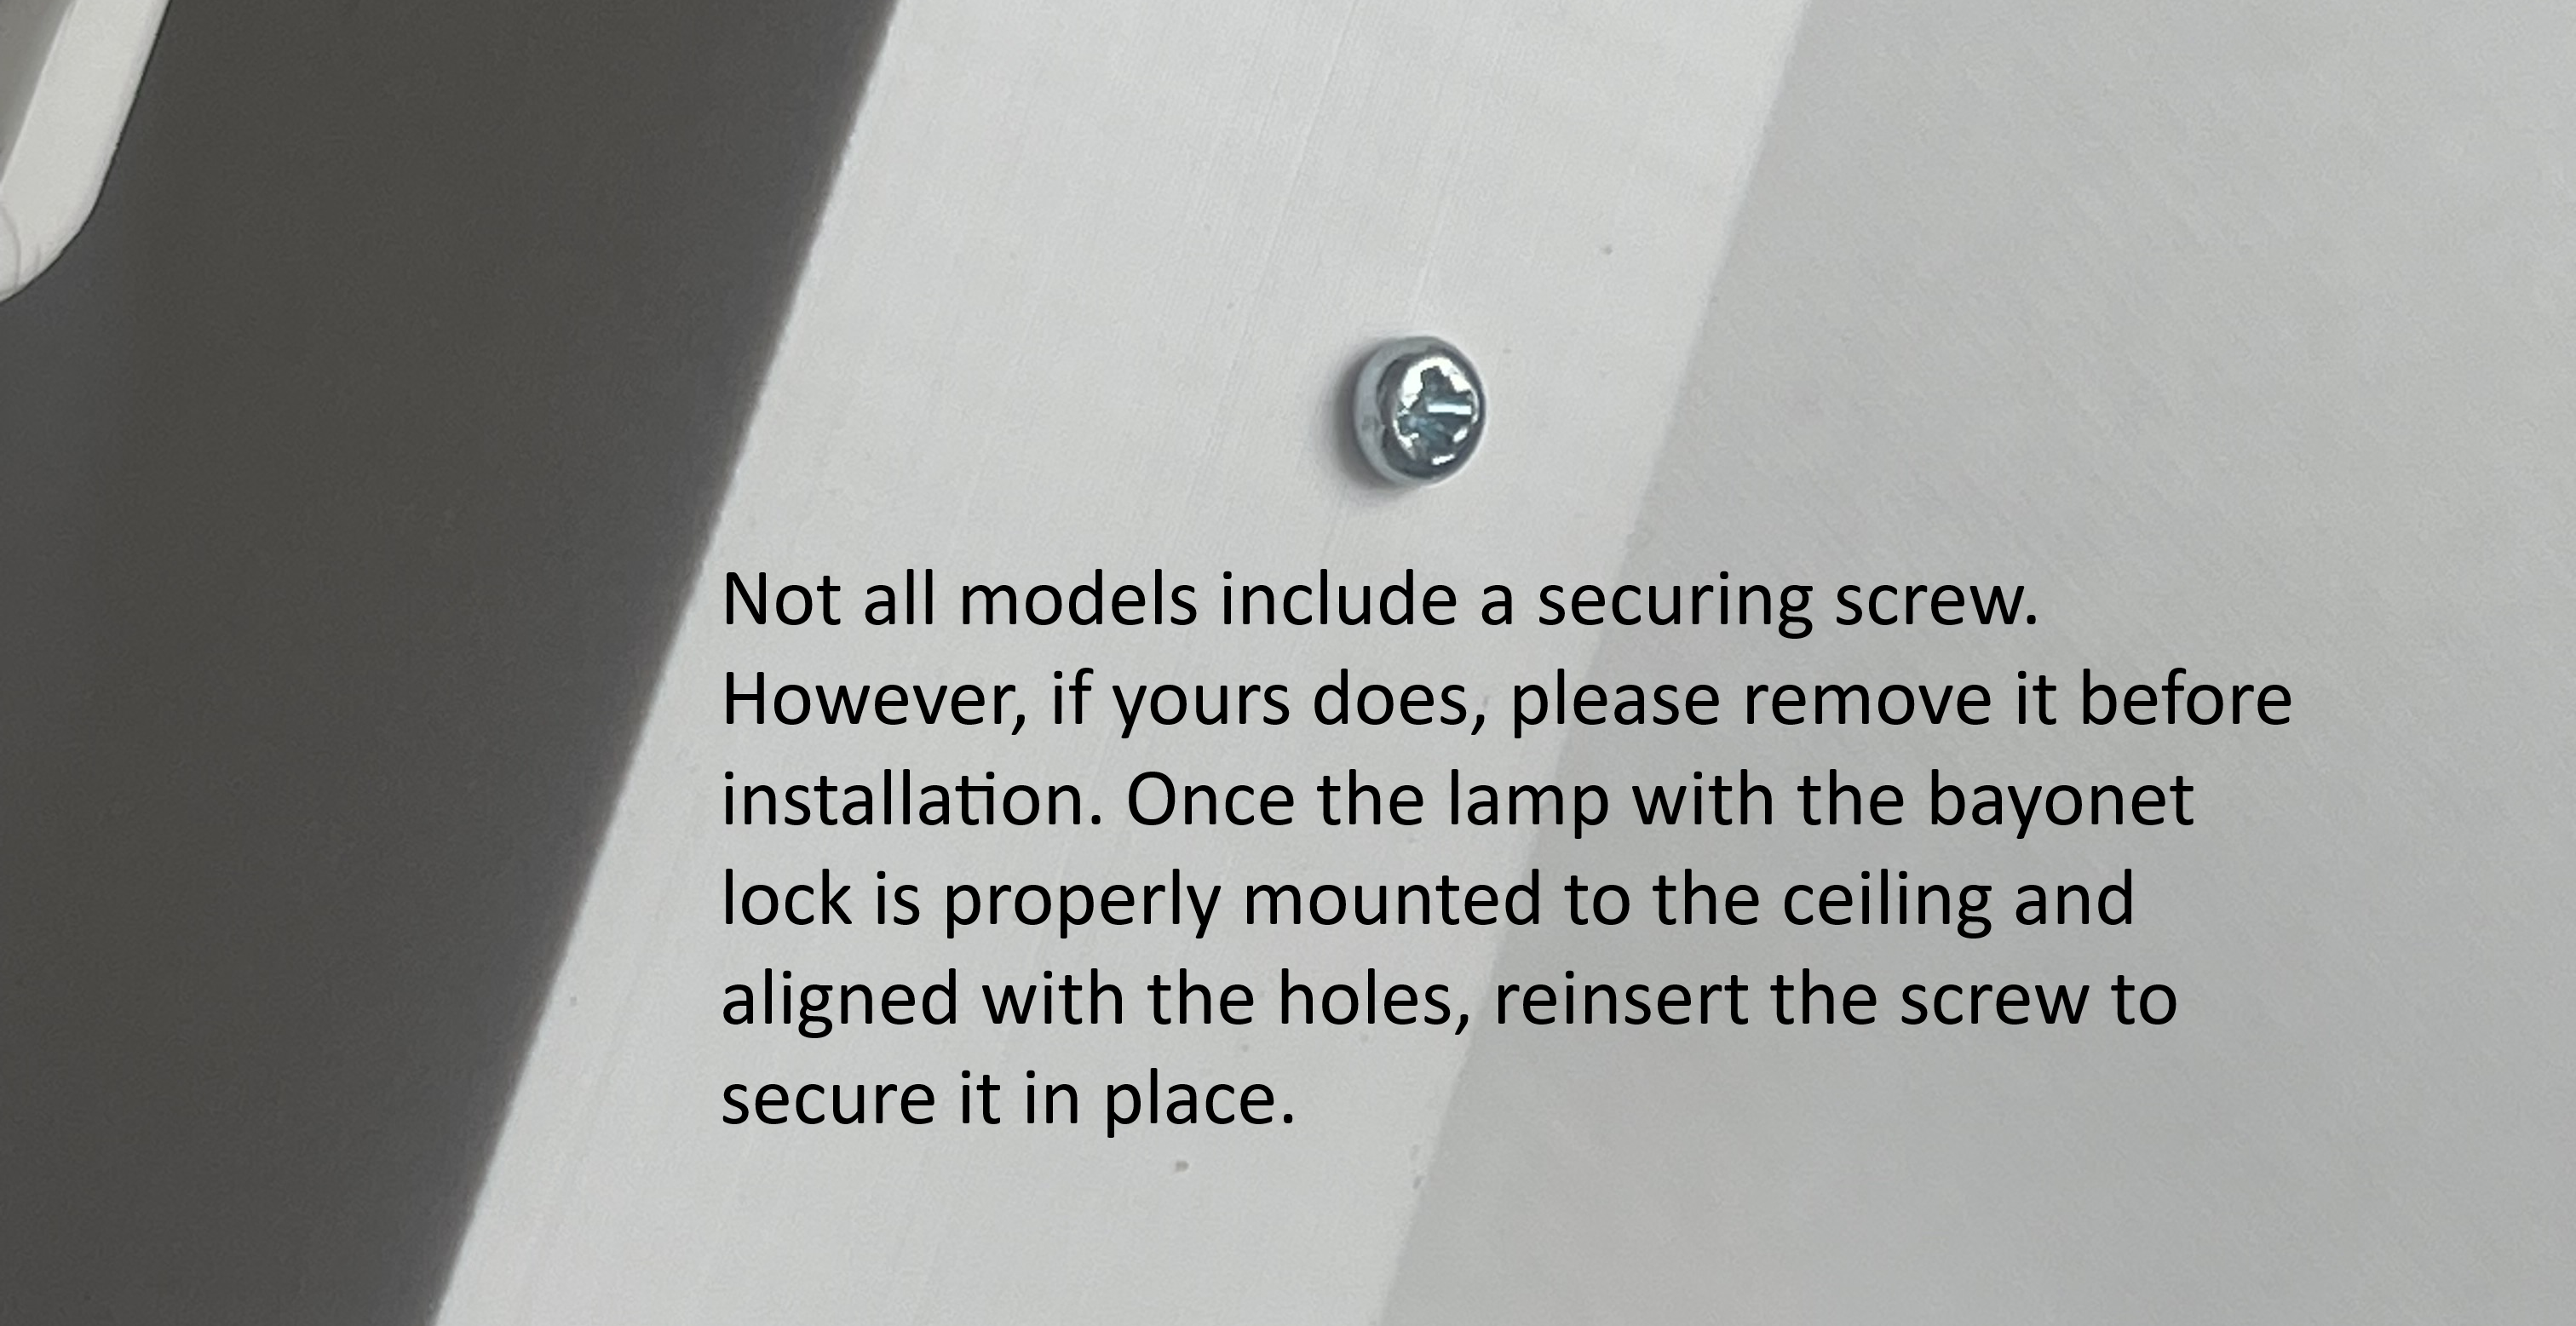
Not all models include a securing screw. However, if yours does, please remove it before installation. Once the lamp with the bayonet lock is properly mounted to the ceiling and aligned with the holes, reinsert the screw to secure it in place.
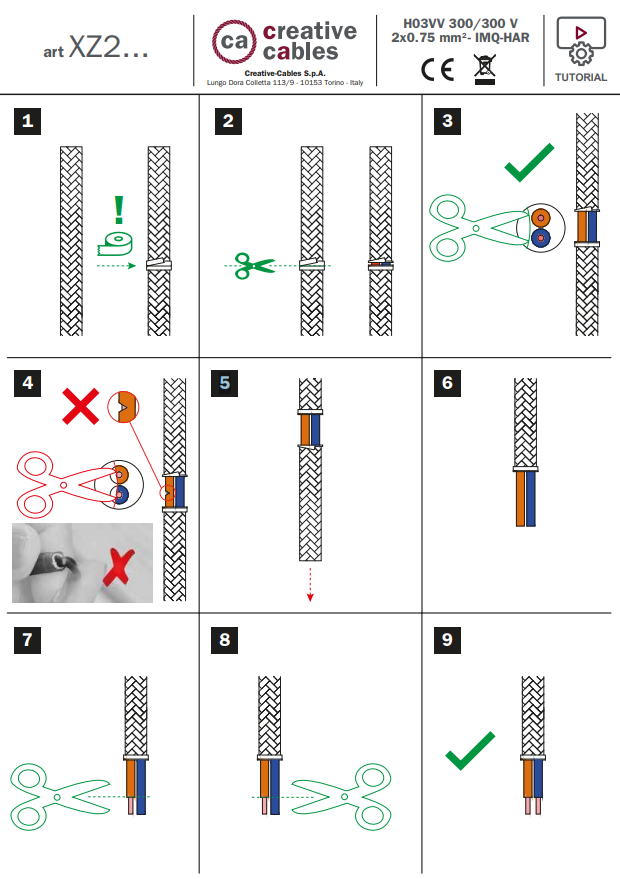
Kabel vorbereiten und Adern abisolieren
Bereite die Kabel gemäß den Anweisungen unseres Lieferanten vor:

Montage der Deckenrosette (Mehrteilige Version)
Click here: https://customcornerdesign.com/manuals/multi-part-linear/
Installationsanleitung
- Schalte die Sicherung am Stromkasten aus.
- Stelle sicher, dass am Deckenanschluss keine Spannung anliegt (verwende einen Spannungsprüfer).
- Halte die Deckenhalterung an die Decke und markiere die Bohrlöcher.
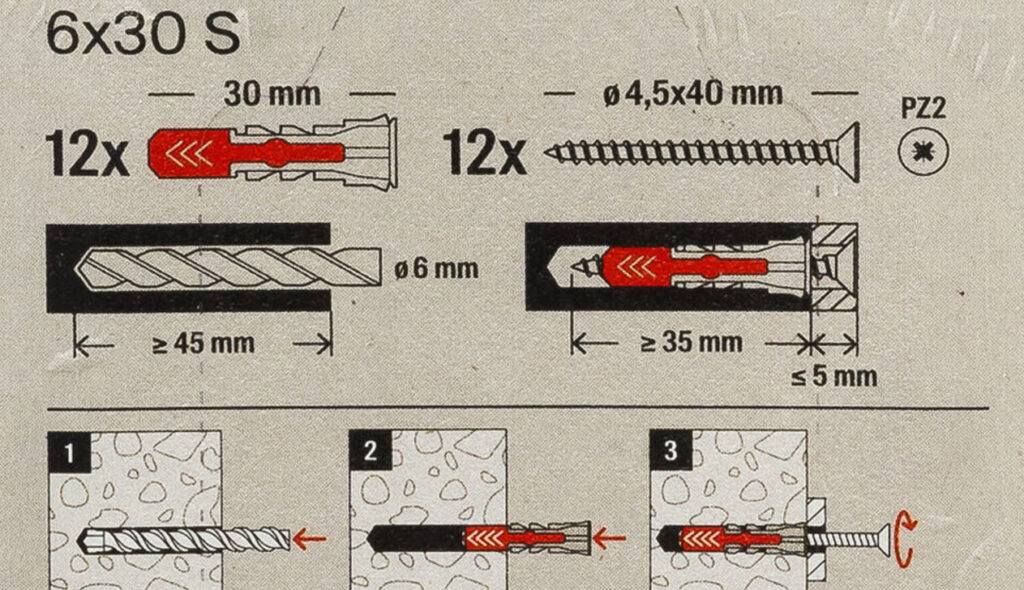
- Bohre die Löcher und setze die Dübel ein.
- Bohrdurchmesser: 6 mm
- Minimale Bohrtiefe: 45 mm
- Schraube die Halterung fest an die Decke.
- Verbinde die Deckenleitungen mit den Wago-Klemmen:
– Phase (braun oder schwarz) → L
– Neutralleiter (blau) → N
– Falls vorhanden: Schutzleiter (grün/gelb) → in eine separate Wago-Klemme und sicher fixieren. - Setze die zylindrische Deckenabdeckung auf die Halterung und drehe sie nach links, um sie zu sichern.
- Setze ausschließlich eine E27 LED-Glühbirne (max. 10 W) ein.
- Schalte den Strom wieder ein – und genieße deine neue Lampe.
WAGO Connectors
- Strip the wire ends (about 10–12 mm) to expose clean copper.
- Insert wires into the connector ports:
- Live wires (brown or red) go into one connector.
- Neutral wires (blue or black) into another.
- Earth wires (green/yellow) into a third.
- Mount your lamp and connect its wires to the corresponding Wago connectors.
These connectors make it easy to add, remove, or rearrange fixtures without tools.
Ceiling rose connection
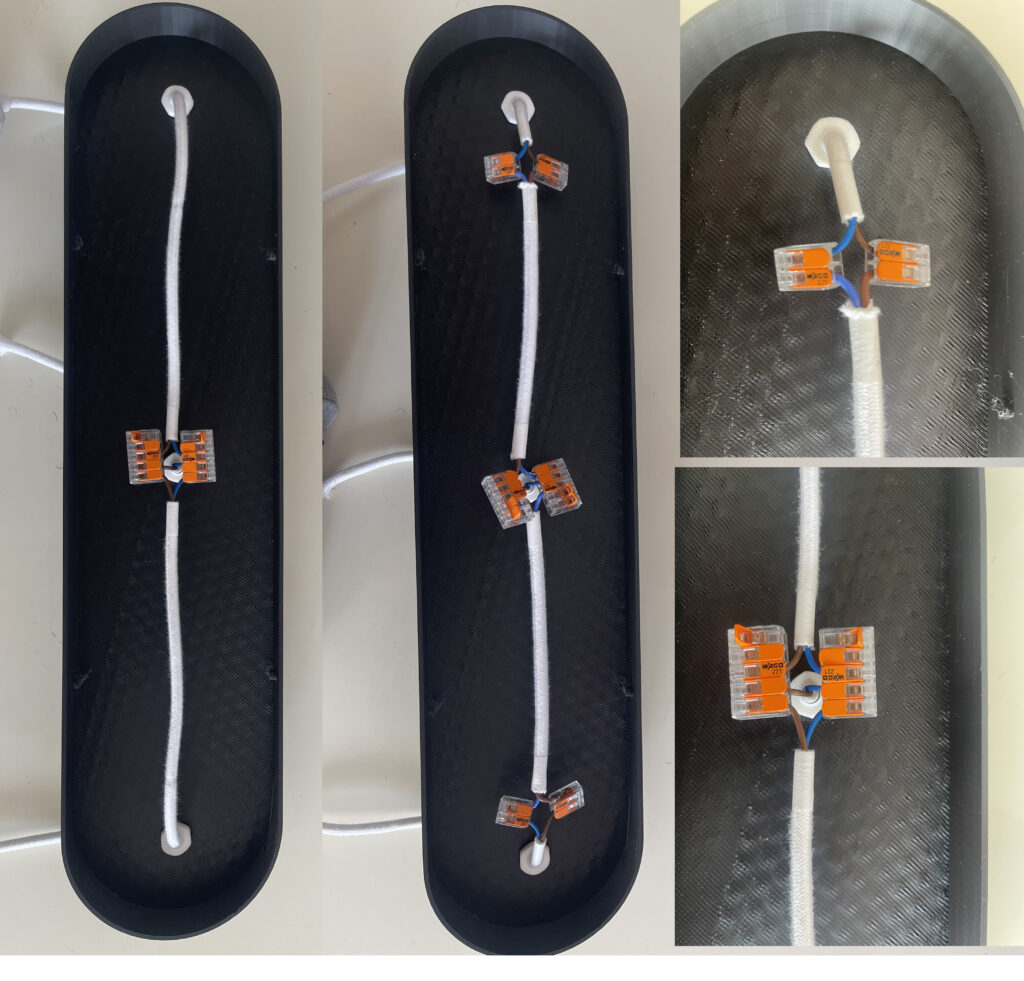
Linear Lamp Setup
Small lamps:
- Use longer side cables to connect lamps toward the center.
- Join wires in the middle using Wagos, with wall cables in free slots.
Large sets:
- Use included short cables and Wagos to link each lamp.
- Connect wall cables into the free Wago slots.
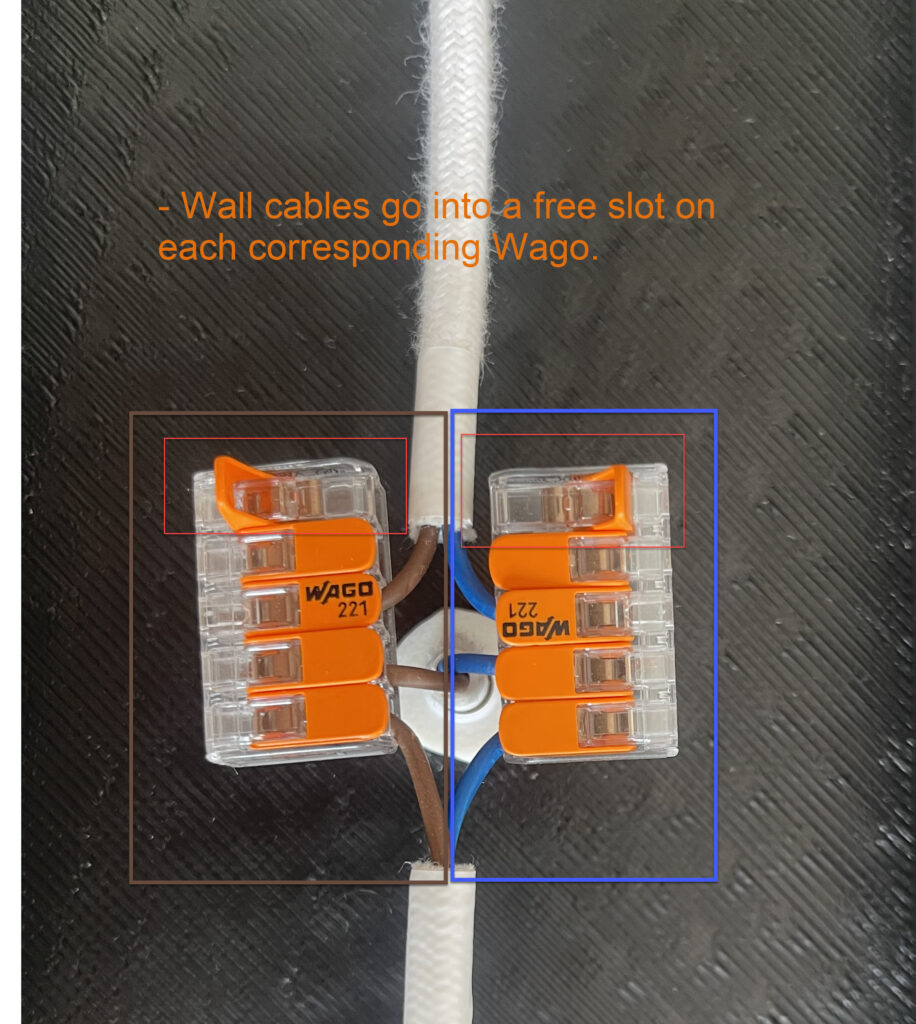
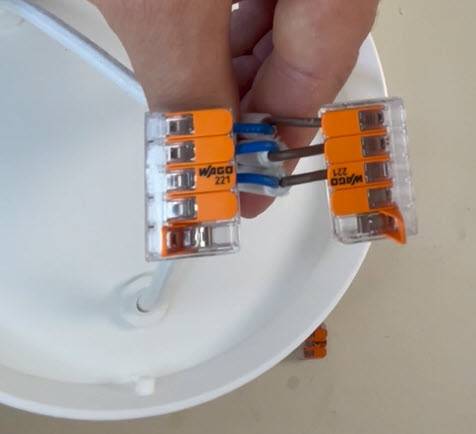
Circular Lamp Setup
- Connect all live wires from lamps into one Wago, all neutral wires into another.
- If there’s a ground wire, use a third Wago.
- Wall cables go into a free slot on each corresponding Wago.
- If one Wago isn’t enough, chain multiple together.
- Connect wall cables into the free Wago slots.
Cable Length Adjustment after installation
The cable length can be adjusted, but only from the ceiling side (not the lamp shade side)!
To adjust:
- Unscrew the cable clamp from the outside of the ceiling cover.
- Secure or push the big nut inside the cover and pull the cable to the desired length.
- Reattach and tighten the cable clamp.
- If the cable is too long and doesn’t fit inside the cover, you may cut it shorter and reconnect using the Wago connector.
Sicherheitshinweise
- Use LED bulbs only. This lamp shade is 3D-printed from PLA and is not heat-resistant for incandescent or halogen bulbs.
- This product is for indoor use only.
- Do not install near water, steam, or excessive heat sources.
- Turn off electricity before installation or maintenance.
- Always install securely into a ceiling material that can hold the weight.
- Not a toy. Keep away from children.
Handcrafted with Care
- The lamp shade and ceiling bracket were designed and 3D printed by hand using the same PLA material for a unified look.
- All other components (socket, cable, ceiling parts) are high-quality, CE-certified parts sourced from trusted EU suppliers.
- Every piece is assembled and tested before shipping.
Need Help?
If you have any issues or questions, feel free to reach out! info@customcornerdesign.com
Einhaltung
- This is a handcrafted item, made in small batches.
- Electrical components used are CE certified.
- Seller is not liable for improper installation — professional installation is always recommended.