Your cart is currently empty!
Handcrafted Pendant Lamp – Installation & Product Guide
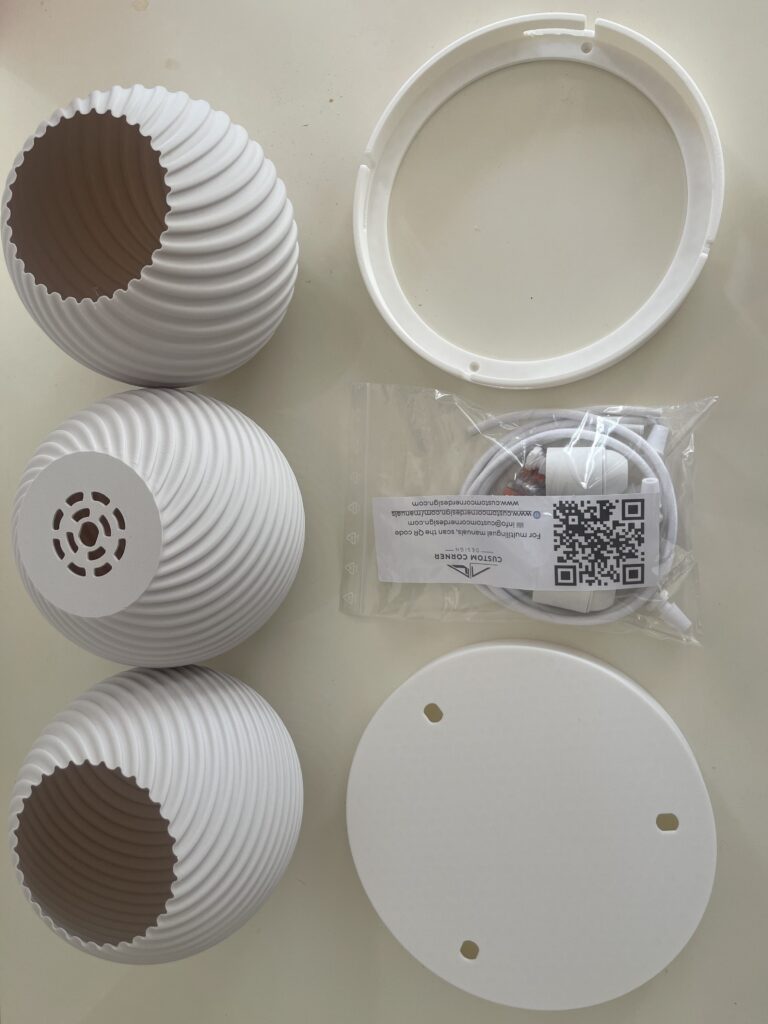
What’s in the Box
Parts made by us:
- 3D printed lamp shade
- 3D printed ceiling canopy
- 3D printed ceiling bracket
Parts from EU supplier:
- E27 socket
- Fabric cable
- Cable clamps
- Wagoo connectors
- Mounting screws
- Wall plugs for concrete
Tools You’ll Need
- Drill
- Screwdriver –
- Voltage tester (recommended)
Before the installation
Prepare the ceiling rose
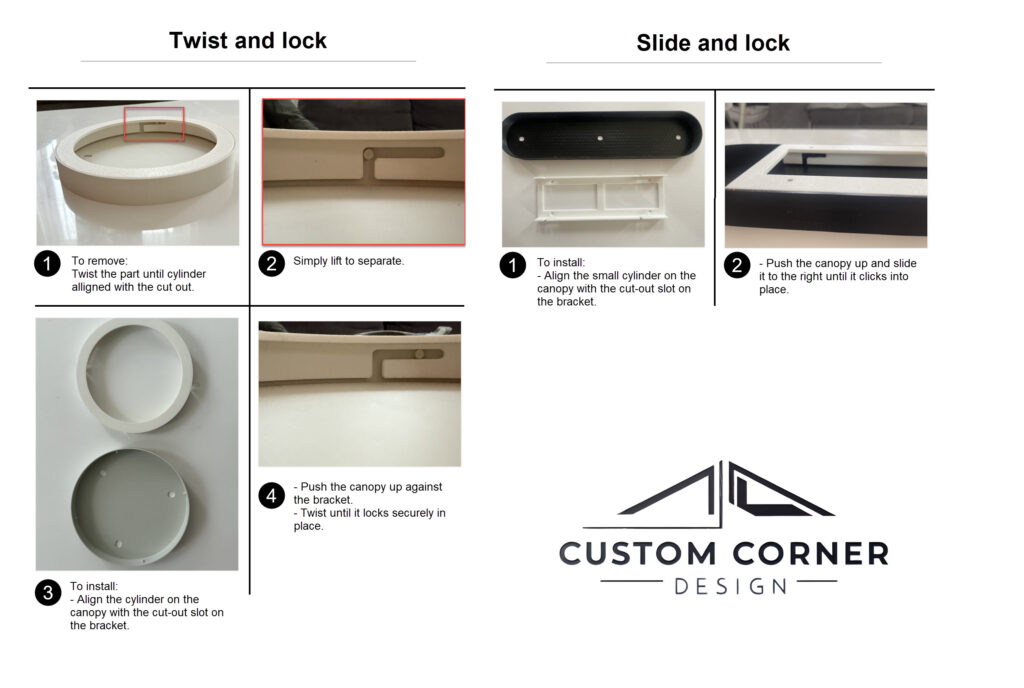
The plastic ceiling cover and rose are secured with a twist-lock mechanism. To begin installation, rotate them to the right to release them.
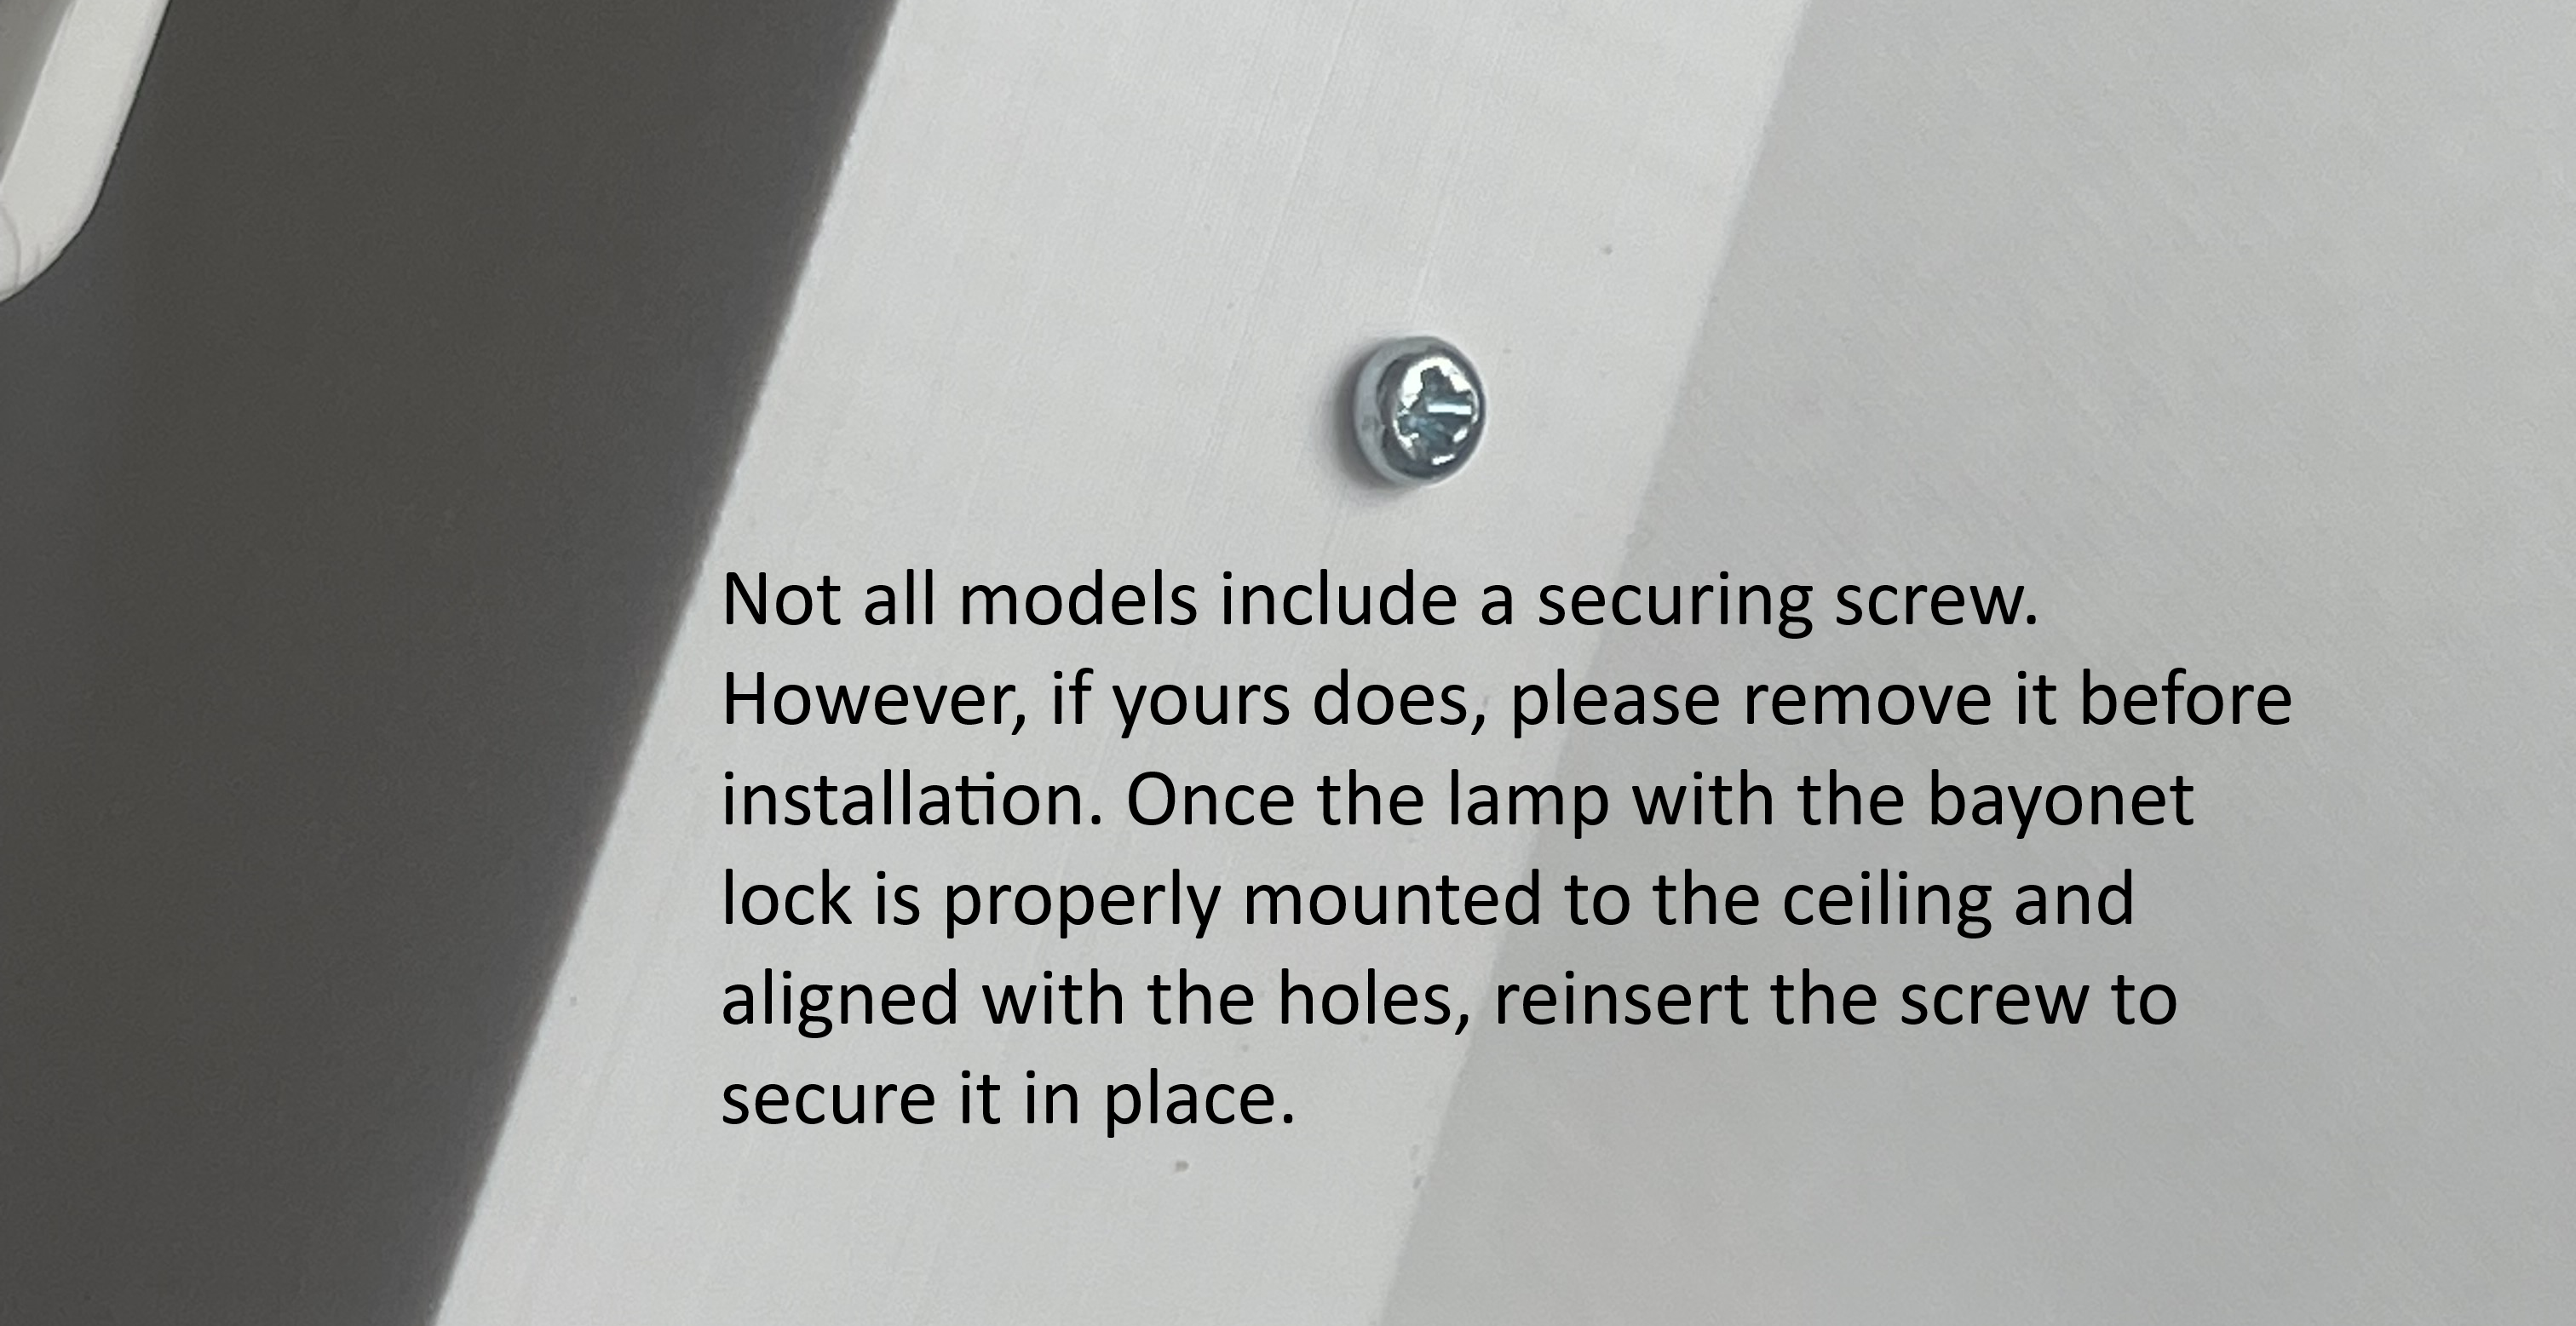
Not all models include a securing screw. However, if yours does, please remove it before installation. Once the lamp with the bayonet lock is properly mounted to the ceiling and aligned with the holes, reinsert the screw to secure it in place.
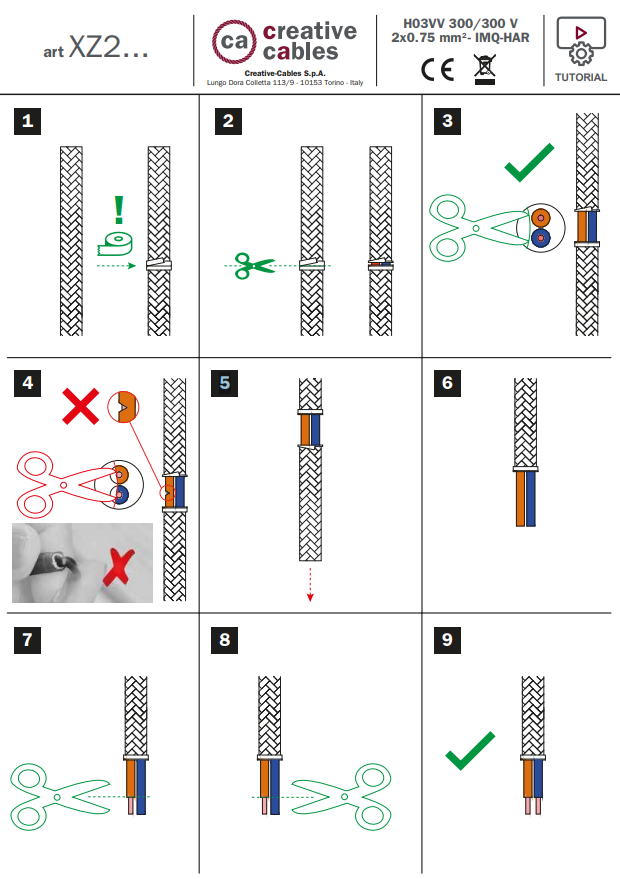
Prepare the cables, strip the wires
Prepare the cables as per the instruction from our supplier:

Ceiling Rose Assembly (Multi-Part Version)
Click here: https://customcornerdesign.com/manuals/multi-part-linear/
Installation Instructions
- Switch off the fuse at your electrical panel.
- Ensure no power is present in the ceiling cable (use a voltage tester).
- Hold the ceiling bracket to the ceiling and mark where the holes go.
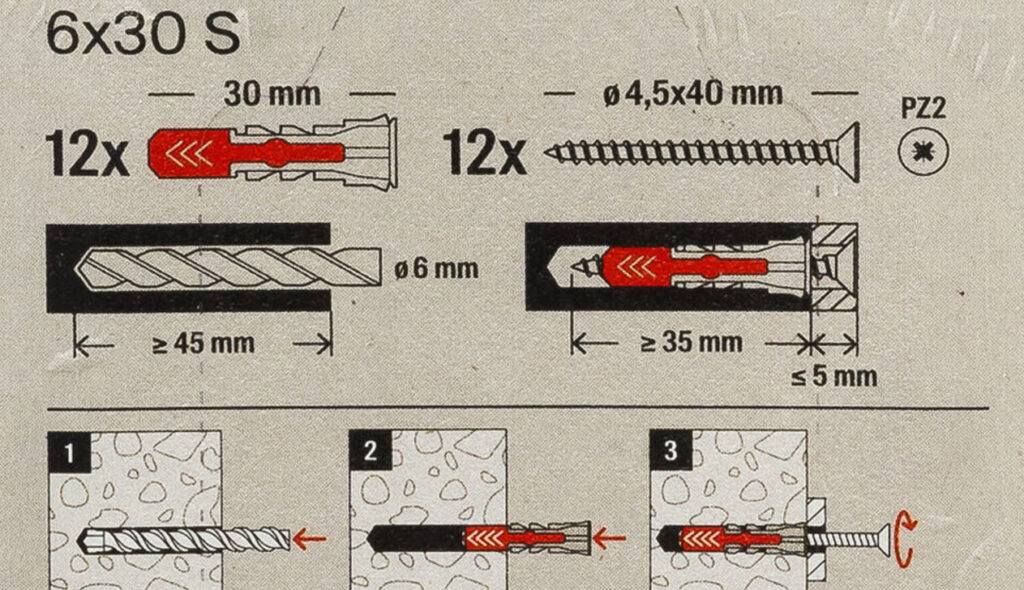
- Drill the holes, insert the wall plugs.
- Drill diameter: 6mm
- Min. drill hole depth: 45mm
- Screw the bracket securely to the ceiling.
- Connect the ceiling wires to the Wago connectors:
– Live (brown or black) → L
– Neutral (blue) → N
– If you have a ground wire (green/yellow), use the extra Wago connector and ensure it is safely secured. - Fit the cylinder ceiling cover onto the bracket and rotate to the left to secure it.
- Insert an E27 LED bulb only (max 10W).
- Turn the power back on and enjoy your new lamp.
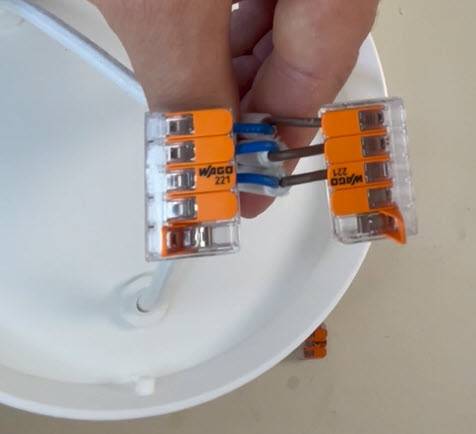
WAGO Connectors
- Strip the wire ends (about 10–12 mm) to expose clean copper.
- Insert wires into the connector ports:
- Live wires (brown or red) go into one connector.
- Neutral wires (blue or black) into another.
- Earth wires (green/yellow) into a third.
- Mount your lamp and connect its wires to the corresponding Wago connectors.
These connectors make it easy to add, remove, or rearrange fixtures without tools.
Ceiling rose connection
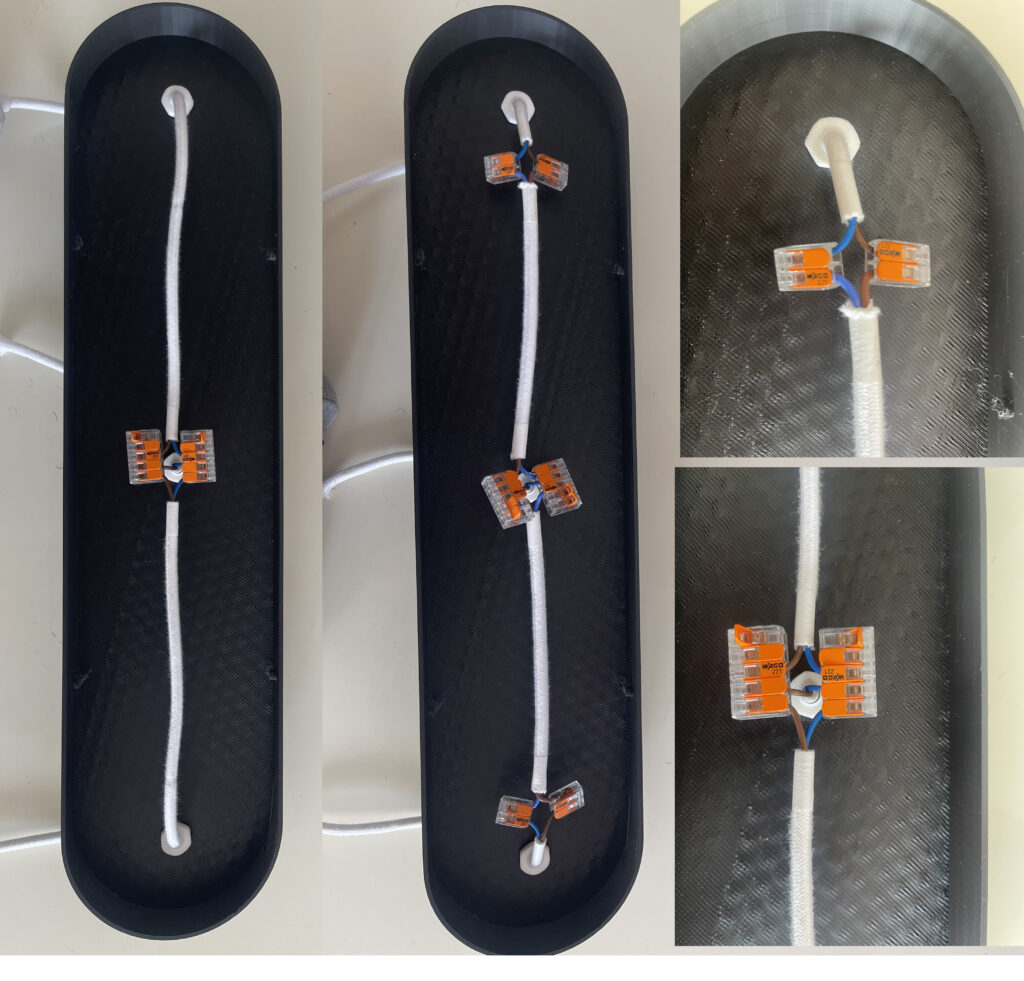
Linear Lamp Setup
Small lamps:
- Use longer side cables to connect lamps toward the center.
- Join wires in the middle using Wagos, with wall cables in free slots.
Large sets:
- Use included short cables and Wagos to link each lamp.
- Connect wall cables into the free Wago slots.
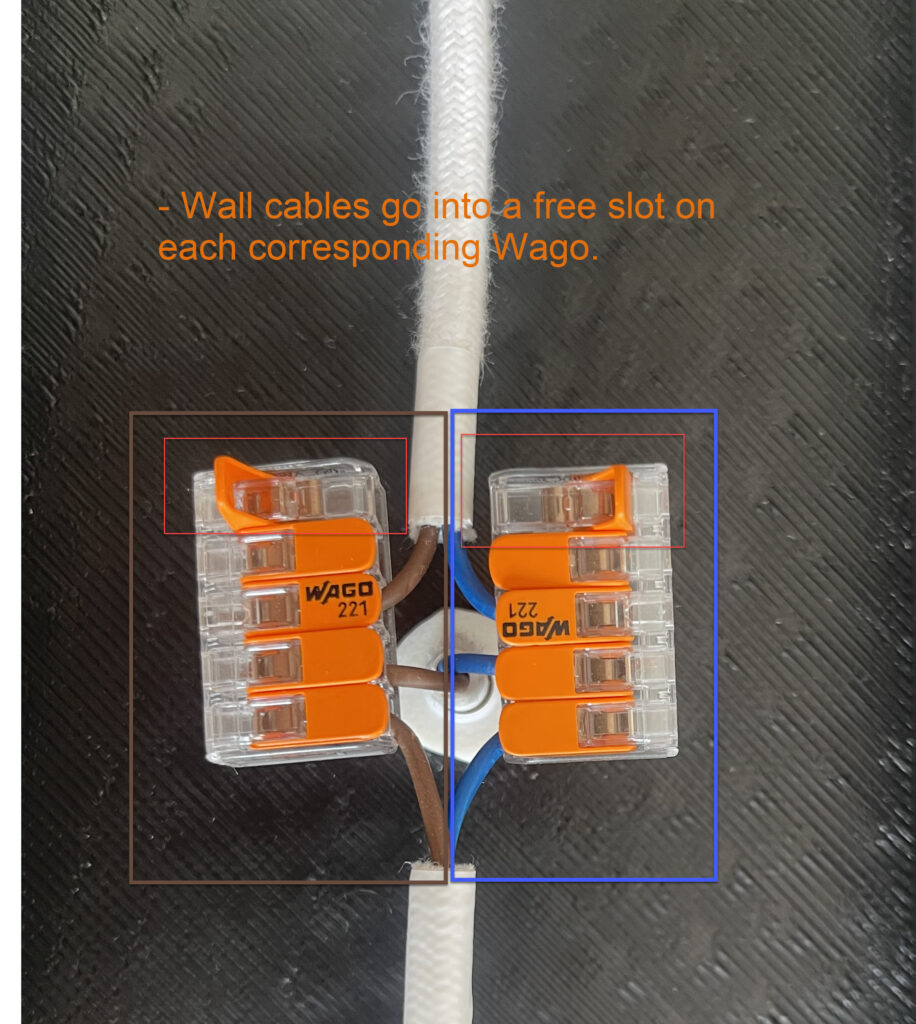
Circular Lamp Setup
- Connect all live wires from lamps into one Wago, all neutral wires into another.
- If there’s a ground wire, use a third Wago.
- Wall cables go into a free slot on each corresponding Wago.
- If one Wago isn’t enough, chain multiple together.
- Connect wall cables into the free Wago slots.
Cable Length Adjustment after installation
The cable length can be adjusted, but only from the ceiling side (not the lamp shade side)!
To adjust:
- Unscrew the cable clamp from the outside of the ceiling cover.
- Secure or push the big nut inside the cover and pull the cable to the desired length.
- Reattach and tighten the cable clamp.
- If the cable is too long and doesn’t fit inside the cover, you may cut it shorter and reconnect using the Wago connector.
Safety Information
- Use LED bulbs only. This lamp shade is 3D-printed from PLA and is not heat-resistant for incandescent or halogen bulbs.
- This product is for indoor use only.
- Do not install near water, steam, or excessive heat sources.
- Turn off electricity before installation or maintenance.
- Always install securely into a ceiling material that can hold the weight.
- Not a toy. Keep away from children.
Handcrafted with Care
- The lamp shade and ceiling bracket were designed and 3D printed by hand using the same PLA material for a unified look.
- All other components (socket, cable, ceiling parts) are high-quality, CE-certified parts sourced from trusted EU suppliers.
- Every piece is assembled and tested before shipping.
Need Help?
If you have any issues or questions, feel free to reach out! info@customcornerdesign.com
Compliance
- This is a handcrafted item, made in small batches.
- Electrical components used are CE certified.
- Seller is not liable for improper installation — professional installation is always recommended.